
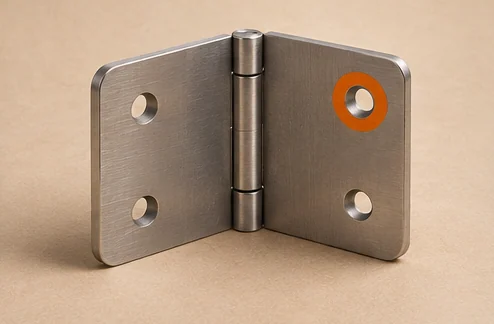
Set up an assembly presence check by identifying one visible part at the step where it should be in view. Establish the expected orientation, include accepted substitutes, and keep an explicit human path for obscured or unmatched examples.
Name the assembly requirement and check point
A fictional workbench has a two-screw bracket installed before a cover goes on. The pilot concerns the head of the second screw at the final uncovered station. A photo showing both heads can support presence. Torque, thread engagement, coating, and the condition behind the bracket require different evidence. Document the intended boundary so a favorable presence result does not get used as an assembly sign-off by default.
Choose when the image is captured. A picture taken before the fastening step cannot distinguish a normal incomplete item from a missed screw. Hold the trigger point and station step in the record. If the line has a rework loop, evaluate the picture from both routine and reworked items separately. Confirm that a successful rework capture links to the original unit rather than a neighboring part.
Compare acceptable variants and real failures
Retain pictures of accepted assemblies using approved fasteners, mounting orientations, and fixtures. If one screw batch has a dark finish and another is bright, include both. Collect a clearly empty screw recess and a shadow or obstruction in the same location to distinguish the evidence. A small alignment change could expose a shiny metal edge in the recess, making the slot look filled when it is empty.
| Fictional bench image | Evidence | Expected outcome |
|---|---|---|
| Dark screw seated in full view | Head and recess both identifiable | Visible presence candidate |
| Unoccupied recess with side reflection | Geometry shows the empty location | Missing-part candidate |
| Bracket edge covers expected location | Image cannot establish the screw's presence | Review or recapture |
| Bracket under a completed cover | No evidence of the fastening point | Route to an earlier approved view |
Make repeatability part of the evaluation
Give operators examples of the approved setup and allowed positioning. If a hand or tool can block the camera for a moment, test at the point the result is expected to arrive. Add several actual unit moves and one normal line interruption to the evaluation. The image and result must stay tied to the correct physical assembly when work restarts.
Measure errors across approved variants rather than relying on an overall pass count. Record every sample where the expected location cannot be found. Ask the reviewer what evidence they receive and which assembly step will confirm the issue if a second view is needed. Approve the output labels only when the operator can explain what the image did and did not show.
Publish the accepted test condition internally
Keep an approved picture of the station, the locations visible from its camera, and a note specifying what outcome is sent to whom. Record the owner if a supplier changes finish or the bracket moves to another station. Run a baseline capture after such changes and compare it with the previous evidence before extending the pilot.
The view selection worksheet helps compare candidate evidence, and the presence check list records part and view. For a system-specific source on positioning and imaging, see Cognex’s part placement and acquisition guide.
Mark the assembly step that creates the evidence
Begin at the workbench with the assembly instruction, a real sample, and the person who decides what to do when a part is missing. Ask the operator to show the part before it goes into the assembly and point to the feature they expect to see afterward. The visible feature may be a screw head, a flange, an edge inside a cutout, or a latch above a housing. Determine when that feature becomes visible and when it is covered, and note whether the station can still stop or recheck the unit when the result arrives.
Use a separate line in the instruction for each required feature. A bracket may have two fasteners that look alike. The review needs to distinguish the left location from the right and show where each was expected. Naming only the component encourages a record such as “screw present” that does not establish whether the second one was fitted. For a repositionable part, document which relative location is acceptable. If orientation is also important, identify an asymmetric feature that makes it visible and give orientation its own expected result.
An image can answer a limited question with high practical value. Presence can reduce the chance that a visibly missing clip is missed during a routine review. The photograph does not establish torque, joint strength, electrical contact, or invisible geometry. If the instruction requires any of those properties, tie them to a suitable separate process and preserve the distinction in the operator screen and pilot report. A worker who reads “assembly passed” may reasonably assume that every required characteristic was checked, so choose a label that says exactly what the decision establishes.
When a part is absent from the image, classify why. It may be missing from the assembly, obstructed by a finger, outside the crop, hidden after a cover was installed, or below the camera’s ability to distinguish it from the background. Pair a physical omission with a physically present but hidden example. Demonstrating different correct actions for the pair is a useful readiness test before the team depends on the result.
Lay out fixture, landmark, and field of view together
A fixture makes the target easier to find when it holds accepted units within a repeatable range. Document the stops that position the part, the edges the software can use to locate it, and any limits on how far the unit can move or tilt. Include a simple picture with the target and its context, rather than cropping so tightly that the station cannot prove it looked at the right place. A narrow crop of an empty patch may belong to a correct assembly positioned too far sideways.
Consider a hypothetical mounting plate with two dark fasteners on a dark frame. The camera view includes both fastener openings and a machined notch that establishes which way the plate is facing. Centered samples look fine. When one stop drifts during changeover, the right opening falls at the boundary of the inspected image while the notch is still visible. A recipe that sees a strong dark shape near that edge may produce a result even though it can no longer inspect the complete target. The setup gate should verify that all required locations remain visible after the context is established.
Pick a landmark with useful contrast and stable relation to the locations being judged. A fixture landmark can establish a camera position but may not establish how a unit sits within it. A unit-specific feature can anchor the expected locations but may disappear when the wrong model is loaded. Use appropriate checks for each assumption. If the cutout happens to resemble a target or the assembly can be loaded in either direction, try left-right reversal and inspect what the result shows.
Check the geometry under usual handling. The operator may reach into the camera view, lean an assembly while seating it, or cover a target while holding it against the fixture. Pick when the capture should fire relative to those actions. Test early, intended, and late exposure timing with the same unit. A solid fixture cannot prevent a wrong result when the trigger fires before the part settles or after the line moves it. Keep a few known incorrect timing cases so later releases can test the gate as well as the visual rule.
The camera-view guide offers a process for comparing candidate viewpoints using the same references. In an assembly presence trial, use it to test whether a side view that confirms seating adds evidence of the feature required, and check whether it removes useful context from another location. A second camera may distinguish two interpretations. A different angle may also add ambiguity that makes a narrower first check preferable.
Treat the identity of the unit as part of the check
Write down the relationship between the assembly, its carrier, the operation, the image, and the result. A carrier might circulate and hold multiple housings over a shift. An imaging session might restart while the assembly stays in place. The combination of a carrier number and a recent time can help trace what happened, but a stable unit-level identifier is better where available. Specify which record instructs the station which parts are required, and retain the actual instruction revision used at capture.
Consider a product family where a second mounting tab is required on one model and omitted by design on another. They may share a fixture. Ensure the system can establish which instruction applies before it evaluates the second location. If the recipe is inferred from a visible shape, challenge it with similar approved variants and unusual positions. Where a production system supplies the recipe, exercise delayed, missing, and incompatible messages. The presence result should be routed for resolution or held under the documented fallback when the station cannot establish the correct variant.
Try a wrong-order arrival. A delayed result from a unit that leaves the bench arrives just as the operator seats a second assembly in the fixture. Have the receiving system prove which item each result describes. Record which result, if any, can still affect physical movement. Then retry capture on the second unit and check whether the earlier result and new observation are linked correctly. A saved image is useful only when a reviewer can associate it with the exact physical item and instruction.
Use the capture condition log to document the normal and exceptional sequences. Include the equipment ID, setup version, assembly family, identity basis, trigger condition, and destination of the decision record. Test whether someone from the receiving shift can recover the correct image from the record and whether they can trace the reason under a partial failure, such as an unreadable label or a frame that arrives late.
Prove the difference between present, absent, and unclear
Build three small groups rather than two. For present examples, show the target location and the physical feature that verifies it. For absent examples, show what the exposed space looks like without that part, using matched views where possible. For unclear examples, keep the part present in some and absent in others while blocking the evidence available to the system. These are needed to validate the decision path when the station sees too little.
A missing fastener location can be a deep dark hole that resembles the fastener head. A flush screw head can produce a highlight shaped like its seating ring. Residue in an empty mounting location can look like a dark cap. Show these comparisons in equivalent positions and states. Highlight what actually establishes presence, such as the geometry of a drive recess, surface boundary, shank, edge, or assembly notch. The clue should remain available under expected material and lighting variation.
If a known clip can fit into an adjacent gap, include a comparison with a properly seated clip. A visible clip nearby establishes that a clip appears in the image. It does not establish that it is at the required location. If seating depth or engagement is part of the instruction, confirm which view exposes the relationship and how the reference owner establishes it. Keep a separate rubric if full engagement requires a physical check the camera cannot make.
Define the station output in ordinary language. An operator might see “Right fastener visible,” “Right fastener absent at required location,” or “Right fastener location covered. Capture again.” Show the evidence and the part of the image to inspect. Retain a reason when the overall unit disposition reflects several required observations. If the only output is a binary alarm, make the reason and evidence accessible in the next action screen.
Use a manual reference for decisions the image does not settle. Document whether the reviewer looks at additional allowed views, conducts an authorized observation, or keeps the unit isolated until inspection is possible. Record both the original automated result and the final human outcome. Retries can resolve images and consume time. Keeping both facts helps the station lead understand what happened and determine how much work is likely at normal pace.
Build a casebook around the workbench
Start with a group of known complete assemblies sampled from actual supported variation. Include different production runs or lots if those conditions matter. Prepare approved staged omissions in each required location. Place a matching correctly assembled unit next to an omitted variant under equivalent handling. Add expected shadow, camera position, and fixture variation before testing deliberately extreme conditions. The desired result should be determined by an independent reference, not the photo interpretation made by the model.
Capture expected mistakes individually and in combination. If two protruding clips are required, create known samples with only the left clip, only the right clip, neither, and both. Then cover one clip with an obstruction while the other remains visible. If the site reports one outcome per location, verify the complete vector of results. If it uses a single physical unit disposition, confirm the order and priorities when one location is definitely absent and another cannot be read. Do the two reasons remain visible afterward?
Use a second group of operational faults. Remove a view the software expects, send an image from a previous unit, present a part under the wrong instruction, and allow a stale result to arrive during reinspection. Keep each rehearsal identifiable to avoid confusing staged behavior with normal production. Confirm that the system logs enough evidence to resolve the case and that an operator does not have to override the check without an authorized path.
Use the presence check list as a starting record. A completed page should name the feature, whether the image can establish it, the conditions supported, and what to do if evidence is unavailable. Attach the minimum photos needed to show the distinction. Add an expected next action and responsible role for each exercise, then use the sheet to compare the reference outcome and what actually happened at the station.
Do not decide coverage by file count. Twenty pictures of the same bracket are useful in a repeatability comparison, and one bracket can still be a single independent specimen. Track repeated presentations under the same unit ID and include representative variation across independent units. Keep staged mistakes separate from any estimate of ordinary workload. When all examples of a defect come from an artificially prepared group, state the basis and describe what additional evidence would be needed to measure real defect frequency.
Read pilot findings at the location and unit levels
Set an evaluation plan before viewing results. Separate confirmed omitted locations, correct assemblies, unclear targets, and unknown configurations. Specify which actions count as an automatic clear, an automatic hold, and a review case. Review empty and present reference cases independently with the same instruction. When disagreement changes the reference outcome, retain the initial observations and the later authority for the correction.
Analyze location level and unit level together. One fictional group contains 120 assemblies with two required clips each. Two assemblies have both clips missing and four have one missing. There are eight omitted locations across six units. A trial that notices seven omitted locations might still catch all six affected assemblies if the one missed location occurs on a unit whose other omission was correctly flagged. That matters for how the check can be used. The location result helps the operator diagnose an exact issue. The unit result shows what disposition was possible under the configured rule.
Consider a second fictional group where all missed locations occur on single-omission units. The same appearance at the location level would hide differences in how many units went forward. Report the counts and cases behind both figures. Include an “unknown evidence” row so a required location without a usable image cannot silently enter the correct group. Keep independent references for any items used to calculate the number of misses.
Measure staff load with cases the operator must handle. If several observations on one unit lead to a single review, count the physical unit once for its disposition and log review events separately for time. Watch how long staff take to find an item, read the result, conduct any observation, and record the outcome. A portfolio of crisp still images presented during a meeting does not reproduce the retrieval work at a busy station. Try an exercise at typical pace and during changeover, when arrivals or obstructions can bunch together.
Observe what a handoff needs. The receiving person should know the unit identity, feature or location that requires review, reason for the action, last usable view, and the applicable rule. A button that bypasses the hold without preserving the reason can undermine the record. Define when the receiving person can resolve, ask for recapture, or escalate the case. Get the operation owner to verify their actual authority and staffing.
Plan code, fixture, and operator changes as related decisions
A proposed change may update the camera crop, alter a reference feature, or use a new recognition model. Each change affects a different part of the inspection. Evaluate the changed part against a frozen reference set and collect fresh acquisition evidence if the physical setup changed. Record which cases it is intended to improve. Then examine known protected examples and representative accepted units to detect regressions where the result had been reliable.
Start with the mechanism shown by the cases. A shaded hole misread as a screw may need a better visual feature or different lighting. Two left-right locations confused by a flipped fixture may need a stronger orientation gate. The wrong product instruction requires fixing identity or recipe selection before refining the feature detector. A review item that cannot be retrieved might call for better physical marking and queue ownership even if the visual decision is accurate.
Set expectations for new component options. A supplier may change a clip from black to gray or change a machined notch shape without changing the relationship the assembly instruction cares about. Record the intended benefit and determine whether that change affects visibility or the acceptance rule. Replay earlier protected cases and collect new examples that include both the approved component and plausible visually similar incorrect parts. Keep appropriate restrictions in place until the new evidence passes the chosen evaluation.
Make intervention causes visible to the teams that can act. Distinguish fixture not seated, uncertain view, component absent, mismatch in recipe, and repeated service delay. Give the responsible person a sample or transition that reproduces the problem. If operation has to use the approved manual method during a repair, specify what happens to pending units and how their results will be documented. Test the transition before a realistic incident.
Rehearse inspection with six fictional fault cases
Use the following production-style examples as a review exercise. Set an expected result for each required location and the unit-level action. Confirm whether the physical item can still be changed and which person would resolve it. The names and numbers are illustrative. Use your actual assembly instructions when making a disposition.
Matched holes with different surfaces
One bracket has a dark fastener already installed and another has an empty dark hole. The approved top view shows that a drive recess or head boundary becomes visible with stable side lighting. Start with both assemblies at the same reference position and compare the raw images. Check whether the observation still holds across the approved range of finish and light. A method that relies only on the amount of dark area could see little difference. The protected omitted sample should stay in the set after choosing a more useful feature.
Present flange outside the inspection crop
A clip is fully seated in a bracket whose left stop loosens. The raw image still shows the assembly. The minimum target location extends outside the crop. A classification for the old crop returns absent. Compare the unit-scoped region and the configured region before deciding that a new training case is needed. Route the unit using the approved recapture or manual process. Rehearse the same event with a known missing clip so a broader crop doesn’t make the system clear ambiguous images.
Right part left in the tray
A small bracket lies in a parts tray next to a unit with an empty mounting region. A detector finds the bracket above the expected area. The actual requirement is presence at a named location, referenced to the assembly. Ask whether the geometry layer can verify the expected relation, and keep the image as a look-alike case in evaluation. If the camera cannot clearly show the opening and the mounted part together, move the view or choose an alternate authorized check. Preserve the difference between a visible part and a verified installed part in the record.
Late result after removal
A unit is removed because an operator notices an unrelated surface issue. An earlier presence result arrives after a substitute unit has been placed on the same carrier. The presence observation belongs to the removed unit. Mark the physical transfer and trace the actual unit-level identity. Use a fresh observation for the substitute. Record whether the earlier result wrongly attempted to change the current carrier state and test a correction with different timing and repeated attempts.
Finger blocks a target during capture
The operator holds the assembly with a finger over the smaller screw location. A second location is clearly visible and correct. Give the obscured location an evidence-unavailable outcome while retaining the confirmed observation at the other location. Ask the station owner to validate a different trigger or a safe instruction to reposition the unit. Where a recapture is required, link the new frame to the original and prove the operator can complete it before the unit advances.
Fully visible clip with separate engagement requirement
A mounted clip is visible and appears in the required compartment. A latch tooth can still sit above its engagement slot and leave the clip loose. If the work instruction demands engagement, perform the independently authorized seating check or obtain a validated view that establishes the relationship. A record stating that the clip is visible should stay accurate even if the seating requirement fails. Include separate operators or setup contexts if those decisions are made at different points.
Set the limits of the first pilot handoff
For the final review, summarize the part or location, supported family and capture conditions, evaluation counts, sequence and prerequisites, and the operator action for each result. Link cases that justify the decision. Record any open condition that requires new evidence, with a specific owner and an agreed retest. Show one accepted and one held unit to the people who receive them, and have those users explain which photo, instruction, and location they would recover.
Keep revised captures and operating limits together. Ask how a station lead knows a fixture was moved or a new part option is in effect. Decide which observer can stop automated dispositions, and how the station can record a safe restart after a protected case passes. Pull one session from the log and compare its active recipe and trigger to the signed handoff. A check that detects a missing part in the lab becomes useful on the line when the team can identify it, repeat its evidence, and respond before the next manufacturing decision.
Validate the normal sequence from both sides of the bench
Give the operator a named complete assembly and ask them to run it without reminders from the evaluation team. Record the point where the identifier is associated, where the part is held, and when they can act on the displayed result. Then ask the receiving quality worker to reconstruct the decision after the unit leaves the fixture. They should recover the configuration, the picture and any overlays, and the observation for each applicable location. Compare their interpretation to the reference instruction. If they describe a whole assembly pass based on a limited feature check, update the labels before testing more units.
Run the same drill with a known incomplete assembly. Deliberately leave a required part out and choose an operator who knows the normal procedure but did not prepare the case. Observe whether they can see which location is involved and find the documented action. Verify the result arrives while the assembly is retrievable. Include an example that must go to an alternate station. Timing the ordinary decision and the alternate transfer will expose workload that is hidden when the pilot is run only at the workbench.
Next rehearse the least convenient legitimate case. The correct unit is in the fixture, and one feature cannot be seen because a temporary setup required a different guide. The current instruction still requires that feature. Verify the station preserves the clear findings from the other locations and follows the authorized fallback on the blocked one. Put in a time limit for the unresolved case and make sure the receiver can see it. Escalating early can give the quality owner more ways to inspect the unit while the evidence is still recoverable.
Decide what to keep for a future investigation
Avoid depending on a human to remember how a specific cycle was run. Retain enough evidence under the team’s applicable retention practices to trace specimen identity, the capture event, the result, and the eventual disposition. Include the active instruction and inspection version. Where a region was adjusted at runtime, record the coordinates or reference geometry that explain the result. Keep the raw image or a stable authorized reference when its evidence could be needed. Agree on how the team will retrieve the original while working from a cropped view.
Use a late incident as a retrieval exercise. Suppose the next shift discovers a unit held for apparently missing hardware, but the night report says the assembly had both fasteners. Check whether the evidence refers to the same identification and correct operation. Compare any rework note, recapture, and signed disposition. If the original image was a frame from an empty fixture following the unit, its trigger and evidence timestamp may explain the gap. Keep the original early observation alongside the correction and test the trigger on new units.
Give the owner a short set of records to maintain. Include approved sample images and their ground truth, the default position of the fixture and camera, a list of supported variants, an escalation contact by role, and the procedure for a protected case that fails. Name an approved alternate inspection for the time when the image check is suspended. If another team changes station motion, changes the component finish, or adjusts the presentation, they need a way to see which evidence could become invalid even if they did not touch the inspection software.
When the station is re-opened after a change, repeat an established complete case and an established missing case, plus a current unit under the actual setup. Validate that the right operation receives the new result and that it cannot change the disposition of any held case without an authorized decision. Use a run with a genuinely variable sequence rather than reading the test photos in a known order. Keep the observation that demonstrates why the procedure returned to its approved state.
Give each stored protected case a corresponding work instruction and a short expected outcome. When the setup owner changes the fixture, use the comparison to decide which earlier approvals remain meaningful. A protected sample for a missing part should still have a documented empty location that the current recipe can find. An image fixture can replay its earlier evidence, but a current assembly exercised at the station is what establishes that the live trigger, view, and physical response still work together. Record both checks when the change affects both parts of the process.