
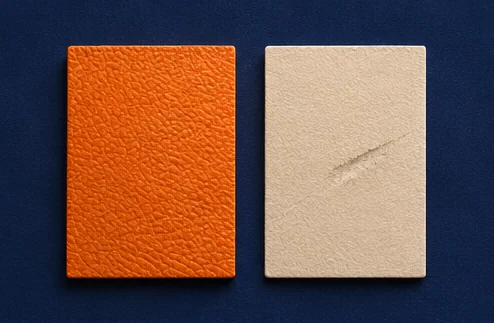
Define surface defect rules using visible marks, their locations, known acceptable look-alikes, and lighting you can repeat. Show the person reviewing an example exactly what to document if the available view is ambiguous.
Describe the mark in relation to the surface
Start with an existing requirement or an independently reviewed example. Use language such as “linear scuff on the visible front panel” rather than “surface damage.” Include an area of interest and examples of marks elsewhere that are accepted. A fixture mark at a concealed edge can have a different disposition from a visible scratch on a finished panel.
For a fictional coated cover, the quality owner distinguishes a narrow scuff crossing the central face from a faint pattern that follows the approved finish. They need a marked example of each. Keep both the close view and the uncropped image when the location helps establish acceptance.
Keep acceptable look-alikes in the sample set
Collect the easy cases and the confusable ones. A brushed finish can create lines that look like scratches at one light angle. Dust can appear similar to a small mark when the camera is focused on the wrong plane. A seam that is normal for one format can differ from an unexpected line elsewhere on the part. Ask a reviewer to point to the exact visual difference they use.
| Fictional mark | Distinguishing evidence | Decision |
|---|---|---|
| Parallel texture over the whole face | Aligned with approved finish direction | Retain as accepted look-alike |
| Isolated line crossing the finish grain | Visible across two adjacent views in the review area | Apply the scuff rule |
| Bright line appears only at one orientation | Current view cannot separate reflection from mark | Get the approved comparison view |
| Minor mark on hidden mounting surface | Outside the area covered by the appearance rule | Use the correct rule for that area |
Test visual consistency across finishes
Compare physical samples under routine lighting and after plausible changes in orientation and material lot. Hold the appearance requirement constant while varying one capture condition. If the quality decision changes because the mark cannot be resolved, record the reason separately from confirmed failure. A proposed revision that makes a bright finish legible may still require a regression check on matte stock.
Ask the person responsible for acceptance to adjudicate genuinely borderline samples. Store the outcome, reference material, and rule version. A reviewer should be able to resolve the same kind of mark without relying on undocumented guesses about the customer’s preference. If an image cannot meet that bar, keep an uncertainty action that does not silently route it to clear.
Repeat the calibration after material changes
A new coating or supplier finish can introduce a different background texture. Compare a set of previously accepted and rejected samples with the new finish under the approved view. Add any newly discovered look-alike to the library. Update the evidence and uncertainty guidance before changing the approved result. Keep the former examples available during change review.
Use the defect library template to organize examples and the lighting guide to design a controlled comparison. Roboflow’s defect detection overview provides an example of how platform vendors describe surface defects and visual inspection use cases.
Anchor the rule to the product requirement
Bring the accepted product standard, representative specimens, and the person authorized to resolve borderline cases into the same conversation. Have that person point to affected parts of the specimen. A defect name can be broad and still describe a manageable decision when it is linked to a visible location, a size or extent rule, and a supported view. “Bad finish” needs more definition. A rule might concern a continuous mark beyond a maximum approved length in the visible panel area, with separate treatment around a seam.
Define the product zones by actual consequence and approved instructions. A scratch on a cosmetic panel may have different acceptance criteria from a mark underneath it. A line in a seam may be normal from forming, while a similar mark on a face can be out of scope or unacceptable. Boundaries may be named in a drawing, a physical reference master, or approved images that show their relation to stable features. Identify which zone applies when a mark crosses two regions, and verify the rule with the responsible owner rather than leaving reviewers to infer it from a folder name.
Keep the evidence question specific too. Some apparent defects are artifacts of lighting, surface contamination, packaging film, or the camera view. A particular optical inspection can evaluate a visible feature in its supported configuration. It may provide little information about structural integrity, remaining material thickness, or the source of a mark. If the wider quality requirement depends on a physical property the camera cannot establish, preserve a route to the authorized test. Describe the camera observation in relation to the actual requirement so staff know which conclusions remain open.
A useful first rule is narrow enough to demonstrate with a handful of representative specimens. Choose one failure mechanism with a recognizable visual consequence and an operational reason to detect it. Preserve its most common acceptable look-alike and the hardest recurring boundary condition. Keep photos of other issues in a separate triage set. This makes it possible to study which visual features support a real decision and whether the initial category needs to split.
Compare acceptable look-alikes under the same light
Suppose a fictional painted housing has a fine line on its visible front face. One line is a shallow scratch that interrupts a uniform surface. Another is a permitted join line at the edge of a deliberate feature. A third appears when a directional light reflects from the edge of a protective film. Treating every long mark as a scratch would hold both allowed and unclear specimens. Design an example pair that differs in the actual rule, then control the capture conditions so reviewers can see which difference indicates the requirement.
Start with a stable station and paired views of each physical item. Document which marks persist when the product changes position and which highlights move with the lighting geometry. This comparison can suggest what part of the image comes from the surface and what part from optical conditions, but it is not an independent proof of defect severity. Confirm the reference by using the authorized inspection method. If staff are expected to use the alternate view in operation, test its availability rather than depending on a bench arrangement that will not be present at line pace.
Consider material variation that resembles a failure. Molded plastic can have a texture gradient. Fibers in board can produce short colored streaks. Brushed metal has a direction of finish visible in a certain setup. Each product may legitimately show its own recurring variation. Show accepted examples from approved production and confirm where the same property becomes actionable under the current tolerance. The difference can be one of extent or location rather than a distinct appearance. Preserve that relationship in the written rubric.
Use known failures that look mild as well as obvious failures. A black mark across an otherwise clean panel gives a useful control, and it may be much easier than the true use case. A low-contrast scratch near a raised edge might dominate the actual errors. A specimen with an agreed physical decision supports better evaluation than a dramatic picture without a measured ruling. Collect related paired capture conditions in a way that keeps each physical unit identifiable. Put independent items from relevant material lots into the holdout when you need evidence about future variation.
Specify how extent and location are determined
Write the geometric measurement as a procedure someone can demonstrate. A long scratch can be described by its end-to-end length, total path along a curve, maximum visible extent across an axis, or the area of a region. These quantities can differ on the same object. If a drawing names a particular one, use that definition. Where the rule relies on an approved visual comparison to reference specimens, record which examples bound the decision and who has authority to interpret the interval. Avoid silently translating such a comparison into a numerical tolerance that nobody approved.
Define what happens if segments are separated. A fictional mark consists of two dark dashes separated by clean paint. One drawing may judge each dash independently. Another may treat them as one cluster near a boundary, based on a stated spacing criterion. If qualified reviewers disagree, capture the exact cases and seek a ruling about the meaning of the instruction. A new check cannot repair an ambiguous product rule by increasing the number of labels in the training set.
A location rule can require a distance to a feature rather than membership in a coarse visual zone. If a mark is too close to a logo or mating edge, show that edge and use a traceable method to derive distance. If part orientation changes, understand whether a fixed photo region still describes the same area. Test rotations and allowable pose against the actual boundary. One important case is a mark crossing a zone edge after the camera crop shifts, even though the substrate itself stays unchanged.
Establish scale and repeatability before using physical dimensions from an image. A stationary flat area with known references differs from a curved or tilted surface whose apparent extent changes with projection. Compare camera measurements against appropriate independent references in the actual range of poses, finishes, and locations. Include repeat captures and request a consistent physical measurement from qualified staff. If a relevant mark spans a curved edge, use a method approved for that geometry or route it to an authorized review.
Report enough measurements to reproduce the decision. This can include contour, selected endpoints, dimension in applicable units, zone identity, boundary convention, and an explanation when a measurement is undefined. A camera estimate shown as a rounded value may look equal to the product limit when the recorded value differs. Choose how the operator sees that difference. Use uncertain evidence handling rather than creating a false appearance of precision with extra digits.
Write a rubric for disagreement before collecting labels
Give each rule a decision by example. Include a clear acceptable specimen, a clear defect, a visually similar acceptable specimen, a verified boundary case, and a sample that cannot be decided with the intended image. Record who resolved the references and how. Keep earlier observations when the decision changed. If the approved standard evolves, store the rule used and the date it took effect so an older photo can be interpreted in context.
Ask two reviewers to apply the proposed rubric separately to a representative group. Let both use the same images and the same set of approved references. Compare where they choose a different zone, mark extent, defect type, or action. Some disagreements will reveal terminology that needs clarification. Some will reveal inconsistent capture or an actual limitation. A meeting that simply reconciles every disagreement by majority choice loses useful information about why the station needs another process.
For each disputed case, name the conflict the next test should resolve. If reviewers agree that a line crosses the class boundary but disagree about its length, run a paired measurement drill using the same endpoints. If one sees a glare edge and another sees a scratch, capture matched views and seek an independent physical determination when possible. If both see the same mark but apply different limits, ask the requirement owner to clarify the instruction. Keep the reasons separate in the reviewer disagreement log.
Agree on the authority for resolving a case and the outcomes available. A reviewer can indicate that a surface feature is visible without deciding whether an ambiguous drawing allows it. A quality owner can update the documented rule with an effective scope. Some gathered items will be unavailable for reinspection and have insufficient evidence. Preserve the unresolved state in the casebook and the proportion of such cases in the evaluation. Removing hard cases without accounting for them can make a later summary look stronger than the scope supports.
Distinguish unknown capture from a clean result
Create an explicit image usability decision. Verify that the evaluated surface, context and necessary illumination are visible. Use the appropriate condition for the selected defect. A small scratch can need a different visibility prerequisite from a larger spot. A photograph might support a decision about a front panel while a side facing away from the camera remains outside the supported scope. Expose that limit clearly wherever the system reports a summary.
Consider the darkest and brightest extremes that can occur in the approved setup. If glare removes a texture feature or merges neighboring areas, an apparent clean surface may be uninformative. If an obstruction covers part of the target zone, the visible remaining region can still establish a defect, while the missing area cannot establish that it is clean. Define the action for incomplete area coverage. A second view may help if it shares a reliable relationship to the same item and the station can capture it in time.
Document the difference between missing, unreadable, and ambiguous evidence. No capture can result from a trigger failure. Unreadable evidence can result from motion or illumination. An ambiguous result can arise from a visible mark that falls between reference examples or now has an unclear business rule. Under normal operation these states can route differently. If they all land in a common queue, preserve the reason so the receiving worker knows whether to request a second frame, inspect the product or escalate a rule.
In a fictional case, a reflective strip covers the upper third of a painted face. The inspection model assigns a low defect score to the available image. The criterion requires the whole face to be visible before an automatic clear. Route through the approved recapture path even if the visible part looks fine. Compare the exact same item after a viable capture adjustment. If one component of the capture path cannot provide adequate evidence, do not adjust the defect threshold to make the low score count as a verified clean result.
Use the pilot to learn which conditions require separate treatment
Choose comparison conditions tied to something the team can change or define. Examples include finish group, material lot, zone, view, light position, and speed. A label called “difficult” can be a useful initial working note. A category such as “dark housing, upper rim at guide position” tells the station owner what to reproduce. Avoid choosing dozens of groups when there are too few specimens to compare them meaningfully. Start with the hypothesis in the recorded cases, then design an appropriate comparison.
For each important finish, assemble approved accepted items and confirmed defects across the relevant range. Use independently sourced specimens where practical. Repeat images of a specimen at multiple positions to learn whether view changes alter the signal, and group related images together where development and evaluation are split. Report how examples were chosen. A balanced exercise set designed to expose protected errors does not represent their natural prevalence. A routine sample can give additional information about queue size under the evaluated conditions.
Measure defects and review burden separately. Record false releases among confirmed actionable reference defects, false holds among relevant accepted items, and the number of units that reached a human. Keep cases with missing reference outcomes visible. A workflow that sends many borderline marks for manual action may protect certain defects while consuming capacity; it needs to meet the operational conditions as well as the selected detection criteria. Preserve the specific observed tradeoff and decisions instead of averaging everything into a single number.
If one finish meets the approved criteria and another does not, look at the candidate interpretation before selecting a fix. A different station layout can aid visibility. A separate scoring method may help if relevant material condition changes appearance. A narrower scope can retain a reliable first result while collecting more evidence. Ask how a station can establish which condition it is seeing and apply the proper approved behavior. A report with separate scores has limited operational value if the actual product group cannot be known on the line.
Test competing explanations in a matched comparison
Suppose a pilot flags a dark arc near a curved seam on one material lot. The quality team considers three explanations. The mark might result from handling, it might be a permitted molding feature, or it might be a highlight caused by the changed angle of the new fixture. Start with affected physical units and an independent interpretation of the actual arc. Compare known accepted and confirmed out-of-tolerance specimens under the same camera setup. Document any differences in how the material was made or presented.
Then change one factor with the specimen fixed whenever possible. Change illumination and retain the original pose. Move the guide without changing the SKU or finish. Check the raw frame against the exact crop and preprocessing used by the operational method. Observe how the apparent line, its measured location, and model result change. Repeat comparisons with independent specimens before extending a conclusion from a single pair. A pattern that follows a change points to a candidate mechanism, which still needs an independent reference and relevant controls.
Record successful experiments with their limitations. A diffuse light might remove the arc that moved with the reflection, while also reducing contrast for a real fine scratch. Include protected samples when comparing the setup. A focus adjustment producing sharper edges can alter the presence of a previously stable texture feature. Show both groups’ counts and examples. When a physical configuration changes, current captures are essential for confirming that a replay result still represents the station.
Consider the opposite outcome. The arc remains in the same location on the panel under several controlled views, and independent inspection identifies a permitted seam. Update the case ledger and clearly define the associated region. Explore which legitimate seam variants the approved rule covers. Make a contrasting group with damage crossing from the seam into the protected surface. This should become a distinct test case rather than being swallowed by a general exemption.
Decide what the workstation should do with the rule
Work through the failure paths with the person who actually handles the product. If a minor cosmetic defect sends a unit to a nearby review bench, find out whether the reviewer can see the observation, locate the unit, and make the decision before the next step. If a protected mark requires stronger action, link the observation to the approved procedure. Give each worker the appropriate authority. A visible model flag should not cause someone to dispose of a product without the agreed procedure or supporting evidence.
Show the most useful evidence alongside the reason. A croppable image can place the mark in its surface zone and select the relevant part of the view. Keep enough context to distinguish marks at boundaries. Present the observed measurement, rule version, and outcome basis where applicable. A reason such as “paired marks exceed approved cluster extent in front zone” gives the next reviewer a concrete start. If an image is unreadable, show the reason and alternate action instead of an unrelated confidence score.
Keep physical unit and decision records associated. If the person cleans or reinspects the unit, retain the earlier image and disposition. Cleanable residue and underlying damage may lead to different actions, even if the original image did not distinguish them. Record any approved handling that changes the physical condition and obtain new evidence. A reviewer viewing the record later should know what the station saw before and after the intervention.
Exercise the queue during the expected timing and staffing conditions. If two reviews join the queue after a brief lighting disruption, check whether the receiving role knows which unit to retrieve first. When one unresolved result is nearing the approved deadline, show the next escalation. Rehearse a verified alternate process for interruptions rather than asking an operator to invent a procedure on the spot. Keep the number of open cases and their disposition visible at shift turnover.
Explore four fictional cases with an independent referee
Use these examples to practice classifying the evidence and deciding the next action. The circumstances and values are fictional. For your own line, obtain the responsible team’s approved limits and suitable references. The exercise works best when two participants write down their decisions before comparing them with the reference.
One narrow mark crosses two zones
A painted panel has an approved cosmetic outer zone and a recessed area with a different allowed appearance. A scratch begins in the recess and extends into the outer zone. Both areas are visible in a top-down photo. The initial system assigns the entire line to the zone where its center falls. Ask the quality owner to demonstrate how they apply the rule to a mark crossing the boundary. If the requirement evaluates the protected portion, preserve the contour and protected segment’s measurement separately. Compare marks with similar overall extent that fall entirely in each region and include several crossing examples. Update the decision rule if the center-based shortcut does not reproduce the approved outcome.
The line moves when the illuminator moves
A dark glossy panel shows a narrow bright line near its edge. Applicable requirement documents describe both a permitted fillet and an unacceptable scratch. An alternate controlled view shows the highlight at a different place on the same part. A human inspection confirms no scratch in the supported region. Save the two frames and their conditions, and identify which appearance seems consistent with the optical change. Include known real scratches under the same light change and evaluate whether the proposed arrangement still reveals their features. Treat the optical comparison as evidence about the capture design. The reference decision still comes from the authorized review.
Two short marks look like a connected cluster
A textured cover shows two isolated scuffs separated by a small gap. The existing practice applies separate length limits to isolated marks and a separate rule to clusters. The reference note has no method for deciding when nearby marks count as a cluster. Collect accepted and held examples with measured spacing and review them with the rule owner. Do not broaden the event into a training request before the business decision is defined. If the rule is clarified, capture the version, effective scope and approved examples, including any condition where staff cannot reliably measure spacing in the current view.
Borderline damage is visible only on an alternate view
A cylindrical housing rotates as it reaches the station. A narrow abrasion near the shoulder is visible only in certain orientations. The proposed automatic clear considered the first frame regardless of which part of the shoulder was visible. Compare a known abrasion and a known acceptable surface at the allowed orientations. Decide whether there is a reliable way to correlate supported views of the same unit, or whether a different stage could give the needed visibility. Keep a separate status for images that do not cover the relevant shoulder. Prove the operator can actually use the approved alternate process before considering other product groups.
Hand off the standard as something that can be repeated
Include the accepted and prohibited appearances, the boundary cases, the scope, and the source of authority. For each ambiguous example, attach the alternate action or source of independent evidence. Put one pair with a visible defect and an accepted look-alike close together in the retained casebook. Include which capture settings and fixtures made the difference reproducible. Leave enough context for a future reviewer to recover the underlying physical requirement when the artwork or material changes.
Show evaluation results to both the person who owns the product definition and the person who operates the station. Ask the first to verify the interpretation of location, measurement, and borderline rules. Ask the second to explain what they do when the unit is flagged, hard to see, or close to the authorized boundary. Capture any mismatch between the paperwork and the real action. Decide which further comparisons are needed and who owns them.
Update the reference set when new evidence changes the effective scope. A supplier finish change may introduce acceptable texture variation. A revised product drawing may move the protected zone. A changed camera setup can alter visibility while the requirement stays constant. Each situation calls for a comparison of the affected evidence using current reference rules. Document why the revised outcome is defensible, keep the previous cases accessible, and record which version can be used for production.
For a final review, choose one accepted routine specimen, one known reference defect, and one case where the current view gives insufficient evidence. Trace each from capture to decision using the same record the line uses. Then compare the observed result with the applicable instruction and recheck how any unresolved item was handled. The strongest evidence for a defect rubric is an actionable decision supported by a repeatable description of what the team can see.
Know when to split the surface rule
A combined defect class can make an evaluation hard to interpret. Suppose a single “surface problem” group includes fine scratches, wide smudges, and paint chips. A detector discovers all visible chips and nearly all smudges. It misses a recurring fine scratch in a protected area. If the group is dominated by chips, the overall count can hide the exact miss that matters to the owner. Keep error counts at the level of the business rule and the operating condition when collecting the evidence permits it.
A split can also make a process harder to maintain. If similar labels trigger identical actions, reviewers may spend time arguing about terminology without improving disposition. Compare whether distinguishing two appearances will support a different test, needed authority, or worthwhile process repair. Record the types as investigative metadata if the release rule is genuinely shared. Where the defect types have different thresholds, relevant views, or physical handling, keep the separate rules explicit enough to use.
Rehearse the change with earlier cases. Review whether a newly separated category has sufficient confirmed defects and meaningful controls of its own. Some older photos might be adequate to judge combined surface condition but lack the evidence needed to classify the mark more specifically. Mark those records appropriately, seek newly reviewed examples, and keep the earlier evaluation traceable. Changing the class structure after evaluation can otherwise move errors among categories without improving the actual decisions.
Finally compare the written definition with the normal report and work instruction. If the report says “within specification,” identify the exact surface properties and zones supported by the approved check. If a reviewer can see only one relevant side of the item, make that view explicit and describe how the rest is assessed. A useful report maps each supported finding to its own evidence without implying that the full product has already been accepted.
Use a printed example or digital record with the zone boundary shown on the original image. During the handoff, give two people the image and ask them separately which parts of the mark meet the documented rule. Compare what they select with the physical reference whenever available. If they agree that the mark is present but cannot agree where its endpoints lie, name the authorized measuring method or keep the case in review. Keep a case where the mark touches the zone boundary but does not cross it, so the approved inclusion convention can be checked during later updates. In a software replay, compare both the final state and the selected contour. Two versions can make the same decision on a single unit for different reasons, which matters when the next specimen is slightly closer to the limit.