
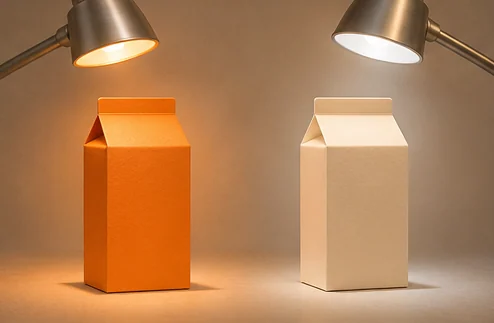
Control inspection lighting by making the feature visible across normal product orientations and finishes. Compare the same reference units under candidate settings, check the limits of the selected setup, and route frames to review when a highlight or shadow obscures a decisive edge.
Start from what a reviewer needs to see
Select the feature before choosing a light. A label-placement question depends on finding a package edge and label boundary. A surface-mark question may require directional light that reveals a shallow scratch. The same bright image can reveal one feature and hide another. Use the original frame at normal viewing size and ask different reviewers which visual evidence supports their decision.
If the mark disappears after the illumination shifts, collect the pair. Record whether the visibility changes because of reflection, shadow, tilt, or exposure. A mark that exists only in one view might call for a more repeatable setup, a secondary view, or a scope decision. Do not assume changes to recognition software will recover an edge that the camera did not record.
Make comparisons that isolate one change
Set up three physical examples for the fictional carton line. Use an accepted matte carton, an accepted glossy carton, and a glossy carton with a measured shift that matters to the pilot. Photograph each under the current light and under an alternative arrangement. Keep the fixture position and camera view constant. If the test also changes exposure or angle, record it as a separate comparison.
| Fictional observation | What to vary next | What to retain |
|---|---|---|
| The glossy front edge disappears in a narrow bright strip | Light position or diffusion with the carton fixed | Both original pictures and the location of the hidden edge |
| All labels lose detail at the same exposure | Acquisition exposure while preserving view | The before and after setup, material, and unit ID |
| Shadows appear only after the fixture is shifted | Approved fixture position with the same light | The alignment reference and the condition change |
Ask reviewers whether they can mark the relevant edge and make the same decision as they do on the physical sample. A view that changes their interpretation of the label window deserves another test. Compare captures from an ordinary day and a day with a routine difference such as brighter ambient light. Do not assume the station will always match the test bench.
For terminology about acquisition settings and exposure in a machine vision system, see Cognex’s advanced acquisition settings guide. Record the controls available in your own setup and confirm that the people who need to operate them can reproduce the selected configuration.
Set a rule for unreadable frames
Write an observable rule such as “both lower corners of the placement window are visible.” A generic warning about glare does not identify a stopping point. Document the next action when a bright band covers a corner. One site may request a second capture. Another may send the item to an existing manual station. Consult the supervisor accountable for how the item is handled.
If glass or shiny film shows a glare pattern that changes between lots, retain the result by condition. Compare rates of recapture as well as candidate defect outcomes. An adjustment that reduces false flags while increasing the number of unusable frames may therefore move work from one queue to another. The best decision depends on whether the second queue can clear its items safely.
Preserve the baseline
Photograph a stable sample after confirming the preferred setup. Keep its material finish and label position documented. Save the capture settings with the file and record who can change them. Give the shift lead an example of a condition to flag and a way to check for it without relying on visual recollection.
When diagnosing a change, inspect the baseline and the current reference side by side. Check the lamp and fixture against the settings first, then look at the package finish and angle. Choose a next comparison that distinguishes the hypotheses. Keep every approved revision in the capture condition log and send unresolved changes to the capture drift review.
Start by separating light, exposure, and processing
Troubleshoot the image in three stages. First establish what light reaches the package and from which directions. Then establish what the camera records with the current exposure and gain. Finally inspect the image after cropping, resizing, or tonal adjustments. Changing all three can make a difficult image look better without providing a way to reproduce the change. Review the sharpest original file and any version sent to the inspection check.
Begin with the light and how the surface responds to it. A glossy label reflects a small bright source more strongly at some angles. A paper edge can cast a shadow that resembles a gap. A foil detail may reflect the color of an object near the station. These patterns vary in different ways when you turn the carton, move the source, or shield ambient light. Record which change moves the troublesome feature in the image. A mark attached to the package stays in the same physical place even when its contrast changes.
Then look for loss of detail at the camera. If a region is saturated in the saved original, reducing the brightness in software may leave a darker patch with the same missing detail. If brightness is low and camera gain is high, detail at the edge may compete with noise. Use saved reference images for the same unit before interpreting a darker or lighter overall appearance. The question for inspection is whether a person or a check can read the feature under the approved operating conditions.
When you compare image processing, keep the original capture settings with the comparison. Automatic adjustments can make each frame pleasant to view while changing the appearance of precisely the edge you need. A classifier can also be given a grayscale crop that hides a color contrast visible in the operator display. Ask which version actually produces the decision and whether the people auditing it can inspect the same evidence. Good display presentation and useful measurement may require separate review.
Use motion to distinguish a reflection from a surface mark
Move one component at a time under the site’s approved test procedure. Keep the package in a known orientation and change the light angle. Observe which bright or dark area moves, and check a clean control under the same conditions. Next, return the light to its documented position and move the package through its ordinary range. Keep the camera and its settings fixed during both tests. The response helps distinguish a stationary lighting effect from a feature tied to the package.
Consider a fictional glossy wrap with a thin stripe close to the right edge. The team wants to identify a cut in the wrap. Under the current light, both an intact stripe and one cut appear as a white streak. When the light changes direction, the bright region slides across both packages. A second, narrow shadow remains at the cut on the defective sample. The paired observation gives the team evidence about a possible capture adjustment. Before using it as a rule, compare several clear, defective, and ordinary look-alike samples on both finishes.
Record where a glare patch obscures the feature. A bright patch away from the decision area can be acceptable for a particular check. A subtle patch at the transition between label and carton may make a crucial edge unreliable. A rule based on total bright pixels across the image can overreact to unrelated white space. Consider checking the visibility of the target region directly. Document the exceptions on production-representative units so the test does not assume every package has the same backdrop.
Treat surface creases and curls as their own condition. A slight wave in glossy stock can reflect light in multiple small areas, unlike a flat piece from the sample book. Use the actual applied label or prepared sample whenever possible. Keep the physical positioning stable when trying different sources. If the appearance varies across approved carton handling, capture both extremes. Scope the resulting evidence to what the station can repeat.
Run a matched comparison of three lighting approaches
Choose candidate sources based on what you need to see. Diffusion can spread a bright source over a wider angular range and soften shadows. Directional lighting can emphasize small changes in shape, and may make the same finish more reflective from certain approaches. Backlighting can show an outside silhouette where the station can put a source behind the unit. It offers different evidence from light that reveals detail on the package face. A lighting supplier’s guide can help identify candidate geometries for the type of surface. Your own images determine which trade works at this station.
A fictional label-position exercise illustrates the comparison. A packaging team records twenty units from a common matte carton format and twenty units from a glossy format. Each group includes appropriate and offset placements, and several examples near the acceptable boundary. The team measures position independently on the units before comparing pictures. Under a narrow direct source, acceptable matte edges are visible on all twenty. The same source leaves the lower edge unreadable in eight gloss images. Moving the source to an oblique angle brings back five of the eight, while producing a shadow at the lip on a few tall units. A wider diffused source recovers seven of the eight after the camera is set for it. The final gloss case still needs review.
Those counts do not establish a general success rate. They do let the team identify useful pictures and a next experiment. One option is to compare direct and diffused lighting on a held-out lot of the same finishes, adding the tall carton with the lower edge close to the lip. Another is to ask which view the operator can reproduce across the expected positioning tolerance. Record how the setup handles new and existing formats and how a person recovers the unresolved case. The choice depends on readability and downstream handling, not which average image is most attractive.
Compare the operator burden of each setup. A larger source may reduce the need for repeated positioning but require room above the line. A directional lamp can fit a tighter station and need careful placement. An optical geometry that requires exact alignment after each material change can add setup work or lead to drift. Ask the site team who will restore the setting and how they will prove that the original view still holds. Use a reference unit and simple record before adding the new light to an approved procedure.
Reserve time for the conditions a bench test misses
At a live station, ambient light can vary with windows, overhead lamps, neighboring machinery, and open doors. You can test which of those changes alter the target by storing a few before-and-after frames from the same setup and conducting the comparison under expected conditions. Recreate the relevant light only within approved operating procedures. Note direction, time, product, lens settings and any cover that changed. The goal is to identify repeatable causes, not to assign every shift a separate preset.
If pictures show periodic bright and dark bands, preserve a consecutive capture window. A single bright frame can hide the cadence of a light-source or acquisition mismatch. Record what illumination was active, what camera exposure mode was used, and whether the symptom follows a specific station or capture mode. Ask a qualified technician to evaluate source behavior and safe settings. Compare a stationary reference and a moving unit. A band that appears even when the unit is still points to another class of cause from a band that moves with packaging features.
One way to maintain repeatability is to reduce unwanted light at the viewpoint without interfering with safe operation. A shade or enclosure may help when ambient conditions routinely vary. If you test one, check access for cleaning, material changes, and the operator’s sight line. Compare the original and shaded setups on the same units. Confirm that the new setup does not introduce scratches, contact with the product, or a blocked view. Record the setup boundaries so staff can recognize a displaced or missing part later.
Respect the normal pace. A light setting may be sufficient for a paused unit and too dim for an exposure short enough to preserve moving edges. Use the intended speed and trigger for part of the comparison. Check if edges stay readable during startup, steady operation and a representative restart. Record any adjustments to camera timing or light explicitly. Send cases that cannot show the relevant feature through the approved fallback until you know why they occur.
Budget visible detail rather than prescribing camera settings
Base the comparison on what the reviewer can read. A useful exposure is one that preserves contrast, detail, and clear boundaries in the area required by the check. Image brightness can assist setup, and it helps to track representative intensity changes over time. A single whole-image statistic cannot establish whether a small borderline edge still has useful detail. Put a known target and an acceptable control in the same repeatable position.
Consider a fictional example with a two millimeter offset that spans approximately sixteen pixels in the rectified image. Compare the visible boundary using a clear accepted specimen and a deliberately displaced one. If the same boundary softens across ten pixels on an ordinary moving frame, the reviewer may still be able to see a large error while being uncertain near the tolerance. Changing illumination could enable a shorter exposure, and moving the lamp could change contrast. Test one of those at a time. Preserve both image series and see which actually changes the review decision.
Check whether automatic camera behavior changes between acceptable and defective groups. Different amounts of white or dark packaging can affect an automatic exposure choice where it is used. If an accepted carton is white and the only defective example is an orange test carton, a configuration that varies with brightness can set up a shortcut. Pair accepted and failing cases on each finish. Fix settings during an isolated comparison when the camera and approved operation support that experiment. If production relies on adaptation, verify it with the usual mix and record how it responds to transitions, as well as steady-state images.
When the project covers colored features, use reference units with controlled presentation. A camera or processing pipeline can change relative color appearance depending on illumination and white balance. A printed product detail may look similar to its background under a chosen light. Decide whether the check needs hue or merely visibility. For placement checks, the spatial transition can matter more than faithful color. For a color identification check, agree on how you will compare actual colors and preserve the lighting and reference under which acceptance was decided.
Compare the effect of shape and material separately
Profile materials in a way a reviewer can connect to the line. Describe the region of the label or carton, its finish, and its ordinary orientation. Matte surfaces can look uniform with light from many directions. Highly reflective surfaces can show specific sources and shadows. A transparent film can reveal objects behind it that introduce another source of contrast. Real examples from the assembly you process are more informative than isolated material swatches when the geometry changes visible details.
Use a controlled fixture where it does not distort the sample. Compare flat, tilted and bowed examples of the same finish before switching to another finish. If reflection depends strongly on tilt, a change in product pose may be as important as the lighting arrangement. If a stripe appears on one finish even in the same position, its reflectance or print may need different treatment. Use photographs of paired known conditions. Separate changes in catalog identity from visible differences, since a new material code can still have similar optical behavior and an unchanged code can contain meaningful lot variation.
A fictional example involves clear protective film over a cream carton label. The image shows a bright incomplete stripe where the film overlaps the front edge. A bright stripe can appear on acceptable overlap and on a raised corner. Try the same accepted and raised examples from a view that exposes the edge while reducing the reflection. Consider a secondary view only if it recovers a specific fact and can be matched to the same unit. Test the chosen change on a normal range of packaging positions. Store the sample ID with the light and camera constraints so the team can distinguish expected highlights from unresolved conditions.
If you use multiple lighting settings for multiple questions, make the source order and expected evidence explicit. A surface view may need low-angle contrast to reveal a scratch. A wide light can show label position better. Carry both results on the same unit with separate reason codes. Confirm what happens when one capture fails and who sees that failure. A collector that silently replaces a missing view with the only available frame can still pass a file count check while evaluating the wrong evidence.
Track border cases with a comparison sheet
Put each unit in a row and candidate light settings in separate columns. Describe which region is usable before entering the inspection outcome. Include actual reference class, image IDs, notes, and which action a person took. When a change exposes an edge, show the original and the new crop side by side. If other known cases lose information, include them in the same report. A sample sheet is useful when two people can read the reason an image changed without being told what the project hoped to achieve.
Count usable frames at the unit level where each unit drives a disposition. If a unit must have two views, decide whether both need to be viable to establish the same action. Show numbers for reviewed cases separately. Track the relevant condition denominators. A setup can improve average usability while making a protected subset much harder to inspect. The error bucket review gives a place to keep such a condition linked to a practical retest.
Keep the examples people disagree on. They can reveal a physical transition the new light partially exposes. Imagine four labels whose lower edge aligns closely with a crease. One reviewer uses the shadow under the label and another follows the crease. Give them a physical reference and a paired image under altered light. Ask which feature they can measure and how they would annotate it. If neither can establish the actual edge, keep the planned unknown path and see whether another view can help. A small software change cannot make a hidden feature appear in an existing frame.
Record the result in the terms the process owner needs. Show the recovered evidence, a limitation still present, and which follow-up test will settle the limitation. “Better lighting” is hard to validate after a change or transfer. “The lower edge is visible on the approved matte stock at both fixture positions, while one gloss condition still needs manual review” can be checked against the same evidence. If new cases are added, document whether the earlier examples remain development examples or part of the frozen final comparison.
Prepare the station for a restored setting
Pick a reproducible reference unit for each material family that matters. Store the physical unit where staff can retrieve it and note the exact position used. Save an example image and the current setup record. When a colleague restores the light after cleaning or service, have them capture the reference and compare the visible critical region. Mark a small set of usable and unusable observations they can recognize. A setup can be numerically unchanged while a lamp or cover changes its effective direction.
Use routine maintenance to test what survives. Ask the responsible team to remove and reinstall the approved parts using their ordinary sequence, then verify separate reference images on the same known units. If a bracket does not return precisely, measure the practical range and decide whether it affects the check. A new reference photo may be needed after an approved change. Retain the earlier reference so the next review can explain what moved or why different images were accepted.
Document consumable replacement and alternate settings. A light component may be replaced at a later date with a part that has a similar appearance to operators. Compare the image where the decision is made. A coating can change the color or shape of the illumination even when its nominal purpose stays the same. If a new setup supports some material groups and harms others, preserve the old accepted path until comparative evidence justifies a change. The capture condition log can record the change and the baseline examples.
Do not ask an operator to compensate for unknown light by overriding the inspection without recording why. Give them a route for capture cannot be judged, including the physical unit status, whom to contact and where they can obtain another view. Record recurring overrides by condition. If they arrive at the same hour or product transition, inspect the ordinary light and setup changes for that period. A repeatable route can preserve useful evidence and reduce the need to guess from an individual image.
Walk from a suspected lighting fault to a scoped change
Start with the symptom that reached the station. In a fictional run, a pilot sending cartons to a review queue sees a spike on glossy product during afternoon operation. Quality stores the original images and discovers a bright patch over the same right edge on the new finish. The old material ran on a different day and had fewer queue entries. That information suggests a cause. It leaves open whether the finish, shift conditions, or a concurrent setup change contributed.
Collect matched pictures on both finishes under the recorded current setup before changing it. Compare a known correctly placed label and a known low or skewed label on each stock. Repeat the captures across two routine positions. Log which light sources were active and preserve acquisition settings. If glare appears only on gloss under both shifts, prioritize a material-related comparison. If both materials show the patch when a door is open, assess shielding or geometry. If different factors travel together, document the unresolved question and test during the next setup window.
Try the simplest viable image recovery with the person who maintains the station. One experiment can move the bright reflection outside the reference edges. A second may soften the highlight at an adjusted source position. Compare test images for sharpness near the boundaries and preserve the accepted and rejected conditions. The team should see which material groups improve and which regress. Extend the experiment to ordinary product speed after a clear result on static samples. Use separate evaluation units for the final test.
Bring the station record to the quality decision owner. It should contain the observed failure, approved configuration, new evidence, protected scope and fallback for anything still unreadable. If the pilot changes only gloss conditions, record which old settings apply to the other formats and how the operator selects the setting. Compare the first ordinary production window with the evidence you used to approve it. Handle the uncertain cases using the existing process while the new comparison is being reviewed.
Finish with the smallest next observation that can settle the remaining question. Bring a known failing sample and a routine acceptable sample to the camera view comparison, using stored current images alongside new captures. If the target still disappears in the same region, decide whether a lighting change can recover it at that station and record the alternative view or review route. Choose a configuration because its evidence works repeatedly at the relevant feature.
Check whether the light is suitable for a different task
A working placement setup can become an unsuitable surface setup when the decision changes. Trace both requirements to their physical evidence before anyone proposes a shared profile. The location of a large label can stay visible under broad light even when a shallow nick in its surface becomes hard to see. A directional light chosen for the nick can throw a shadow across the package reference. Compare the same accepted and failing samples so the team can identify the trade in results rather than arguing about the appearance of a photograph.
When the requirements are independent, separate their dispositions. A packaging team may use a first view to confirm position and look at a second illumination state for a raised edge. Define what action follows each outcome and whether both decisions are required before release. Time the transitions between acquisitions, and observe whether the fixture or operator motion changes during that interval. Capture enough independent units to prove that the second observation belongs to the same unit as the first.
Be careful when an image is used for training and for a different person’s reference decision. A physical examination can observe the part from many angles under ordinary work light. An automated check can access only its approved view and exposure. If the reference label says an edge is damaged and the tested picture has no observable evidence of the damage, investigate the capture. Add another viewpoint or retain manual handling for that condition. Labeling more images with the same hidden signal is unlikely to explain the missing evidence.
Decide what to measure during the first week
Plan the first week around a few observable signals the line can collect. A count of images with unreadable required regions offers a direct test of visibility. The number of recaptures and the amount of extra review time tell you about workload. A small independently checked set of accepted and flagged outcomes tells you whether the visible check behaves adequately under actual conditions. Preserve denominators and identify the crop, light, and approved format used.
Suppose the bench comparison expects three out of every hundred gloss units to go to review. During the first two shifts the team sees six out of a hundred, followed by two out of a hundred after a carton roll change. These fictional observations point to a useful question. Do the images show the same reflection at the target, and did the roll change what the team was running? Compare a comparable matte group and the stored gloss reference during each reported condition. A single short period can vary by chance or product mix. An image trend and a condition-specific comparison can show where a retest might help.
Retain the first ordinary false flag and first ordinary miss if the quality owner can obtain them through the approved workflow. A false flag may show that the new light emphasized an acceptable surface detail. An independently confirmed miss can reveal an interaction with a protected defect that was scarce at the bench. Do not change a threshold in response to one isolated frame unless the station response plan calls for immediate containment. Preserve the relevant originals, check versions, physical dispositions and routine detail. Bring the examples to the person authorized to change the station.
Close the change by asking a receiving shift to reproduce the known reference and recover one deliberately obscured frame using the accepted path. Record whether the lamp position, fixture, permitted exposure, and report still tell a consistent story. The first review should produce a narrow ongoing task. For instance, monitor glare near the lower label edge on the first glossy run of each new lot and preserve any physical recheck. Reopen the scope on new optical evidence or an agreed miss threshold. Keep the saved inspection decision record with both configurations and the approved conditions.