
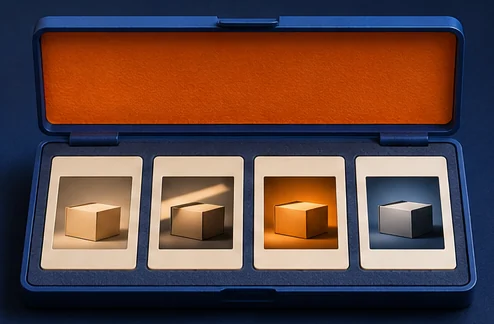
Collect inspection images around a defined visual question. Sample ordinary production, known defects, and cases where the available image is insufficient. Record how every image was obtained and group different views of the same physical unit before splitting the dataset.
Decide which visual evidence belongs in the collection
A capture plan starts with the feature a reviewer needs to see. If the goal is to check whether a label edge crosses a boundary, collect pictures where the package reference and label edge are visible together. Ask the reviewer to identify what should happen if one edge is hidden. An attractive image of the whole line may provide little relevant evidence about that question.
Write the acceptable evidence and intended exception in two distinct statements. For a fitted carton insert, the camera must show the expected slot and the part that belongs there. An image that contains the slot with no insert can support a missing-part decision. A cropping error that removes the slot cannot. Document this distinction before choosing examples, so folders of defective and unusable images do not get mixed together during annotation.
Design a condition map for the station
For a fictional carton check, list both carton sizes, the matte and reflective finishes, the normal and tilted orientations that can pass through the fixture, and the production shifts that use the station. Interview a shift lead about which of these dimensions change together. Reflective packaging might run only with one size. A combination that never appears on the line does not have to consume a collection slot to make the table symmetric. If it can occur after a planned change, track it as a separate collection goal.
Use the coverage planner to estimate the full cross-product. Reduce the schedule by documenting combinations to skip and why. Also record which conditions account for most of the actual volume. Reserve a separate list for rare defects, look-alikes, and boundary examples, because the two lists support different conclusions. Review only the ordinary mix when estimating training examples representative of routine handling or studying load on a particular shift.
| Fictional setup | Observe | Reserve |
|---|---|---|
| Matte carton, day shift | Normal traffic and small position variation | At least one separate capture session for evaluation |
| Reflective carton under overhead lighting | Location and severity of highlights | A secondary view of the same unit, grouped with its first view |
| Known slipped label | Which reference edge confirms displacement | Clearly labeled challenge cases |
| Clipped or covered edge | Whether image alone can establish a decision | Reference action for recapture or review |
Get variation without confusing the defect
Organize the capture session so the effect of a product variation can be compared against a known result. If you collect every shifted label on a dark backdrop and every accepted label on a light one, a model could associate the backdrop with the class. Photograph examples from both groups under each approved backdrop when practical. If only one result is seen with a finish, record the gap and avoid general claims about that finish.
Ask the operator to capture repeatable borderline cases, such as the same kind of slight rotation on each side of the tolerance. Retain actual measurements or an independent reviewer’s interpretation where possible. Retain a set of clear accepted cases that resemble the defects. These examples help reviewers explain why a crease at one location matters and an approved seam at another location is acceptable.
Use controlled changes when it is safe to do so on a sample bench. Change the angle while leaving material and position fixed, then change the material while keeping the setup consistent. In active production, document what changed rather than asking someone to alter process controls just to complete the table. Follow the station’s existing rules for handling rejected and acceptable units.
Give every image a usable identity
Keep the raw capture in a location that matches your team’s data controls. Record unit, stable view name, station, capture time, lighting setup, material or lot, and whether the case came from routine production or a deliberate challenge. Reference an annotation status rather than assuming the filename is a reliable label. Keep alternate views and repeated frames tied to their parent unit.
A reviewer must be able to distinguish “same unit seen after recapture” from “another unit photographed later.” Keep a parent identifier, retry index, and reason when that difference matters. If images are cropped for modeling, save the source relationship and original view. Reviewers should be able to return to the actual frame when the crop clipped the edge used to make the decision.
Review the selected folder for duplicates, unintentional personal information, unusable images, and anything outside the agreed scope before sharing it. Save the held-out group list separately. For guidance on collection workflows in a specific industrial system, consult Cognex’s image capture and collection documentation. Divide the collected evidence using the dataset splitting guide before tuning any check.
Make a capture request people can execute
Ask for a short collection by unit and condition. An experienced line lead should be able to find the carton, take the required view, and enter its identity without interpreting machine learning language. Use the current inspection instruction as the starting point. Name the physical feature that needs to face the camera and the reference that establishes a valid view. If the job is label position, the label and the approved carton datum have to appear together. A close picture of the print may be clear enough to read yet unable to answer the position question.
Separate the list of images from the list of physical units. Six views from one carton give six pictures of that carton. They can demonstrate how position or pose changes the picture, and they are valuable for checking the camera setup. They give only one opportunity to observe independent variation in how the carton was assembled. When the team estimates collection progress, show both counts. If a day’s plan calls for forty physical units, a folder full of frames from five repeated units has covered only a fraction of the plan.
Prepare a small reference set of examples that people can carry to the station. Include a good picture, one picture with the target defect, one acceptable look-alike, and one picture that needs a recapture. Point to the specific edge or feature in each. A rejected carton should have a reason attached to it even if nobody has marked the region on the image yet. A blank reason can force the labeling team to guess whether the physical item was defective or whether the capture simply failed to show the required area.
Ask the person collecting the images to record changes as they happen. If the mount moved between sample groups, give the two groups different setup IDs. If a label roll changed, record the time or unit boundary, even when it was a nominally identical roll. You can decide later that two groups behave similarly. Once you throw away the distinction, the team may have no affordable way to recover it. The capture condition log can serve as a simple record for a session with a small number of setup changes.
Build a record around the decision and the reason
Use the reference outcome that applies to the specified check on the specified unit. A carton may pass placement and fail print quality, or it may have an acceptable label and a crushed corner. Record a separate field for each requirement if more than one is in scope. If the project only checks placement, use the placement disposition and keep the overall product disposition elsewhere. Mixing the two teaches the system that unrelated evidence such as a torn corner predicts placement faults.
Write down how the outcome was established. An operator may be able to measure an offset on the physical carton with an approved fixture. A photo can support a second opinion if it shows the datum and the relevant label edges. If only the image is left and the edge is obscured, ask what independent evidence still exists. A production status that says the carton was held does not establish the reason for the hold. Keep “reference pending” available when the evidence falls short.
The reference workflow deserves its own collection window. In a fictional operation, a technician can take sixty carton photographs during a test period, but the quality lead can measure only twenty before the samples are cleared from the bench. Without coordination, forty photographs arrive without settled outcomes. One approach is to plan smaller batches, keep the units accessible until measurements are done, and confirm that the manifest shows which twenty were reviewed. Another is to use the extra frames as capture examples without claiming they are labeled training cases. Make that choice visible.
Capture the evidence without changing how the product ordinarily appears. A temporary paper tag used to identify a defective unit may be visible in the photo. If every defective unit receives one and acceptable units do not, the tag becomes a simple shortcut. Label the tray, log the sample ID outside the field of view, or place identifiers where the production check cannot read them. Likewise, remove diagnostic overlays from the image fed to recognition unless overlays are part of the deployed input and have been assessed for side effects. Keep measurement annotations separate from the original.
Distinguish everyday examples, protected defects, and unknowns
Create three views of the plan. An everyday collection reflects ordinary line activity. It should include acceptable variation in print, fixture position, crop, and shifts. A protected collection deliberately includes defects important enough to assess on their own. An unknown collection holds unusable captures and cases where the rubric is unresolved. Preserve the purpose of each sample group even if the same tools manage all three.
For a fictional carton label check, the everyday collection can include accepted labels from both common carton sizes, with ordinary shifts across a fixture and completely readable evidence. The protected defect collection could include labels that extend past the permitted bottom edge, close-to-boundary offsets, and rotated labels where one corner crosses the line. The unknown collection includes glare, a box presented backward, and a finger covering the datum. Those are different operating states. A system that flags every missing datum as a defect sends an operator to search for displaced labels while the capture setup is failing.
Prepare targeted samples using physical examples where feasible. A carefully placed test label outside the tolerance can establish whether the visible offset survives normal capture. A digitally moved label can help develop ideas, but a pasted region may change shadows, edges, or texture in ways the live station never sees. Record how you created the example and group derivative files with their originals. A fabricated image cannot establish how the actual carton looks under the station light. A physical prepared defect also differs from live production frequency. Report its value as evidence of recognition under tested conditions.
Avoid letting a shortage of rejected units turn into a silent relaxation of the acceptance check. If a protected defect did not appear in the evaluation collection, report the condition as untested. The practical next step may be to collect a few more independent examples with the line owner, preserve the existing inspection for that failure type, or keep that format outside the automated scope. The pilot acceptance worksheet gives the quality owner a place to specify those choices before evaluation.
Sample the conditions that travel together
Start by listing conditions observed on the line. Then look for interactions. Suppose tall cartons are run only on second shift because the team changes the infeed guide at 2 p.m. and the daytime line handles smaller orders. If every tall carton arrives under second-shift light, you cannot tell from those images whether a problem comes from carton geometry, illumination, or both. Use a short comparison with a few tall and small cartons under the same conditions, or describe the combined condition exactly and limit what you infer.
Keep the condition grid proportional to the decision. A six-column spreadsheet can imply hundreds of combinations even when many cannot happen. A format may always use one fixture and pass a station at only one orientation. Cross out impossible conditions with a short explanation. Preserve common and high-consequence combinations separately. Spend collection time on positions a product can actually occupy and on settings the owner will allow after evaluation. The sample coverage planner multiplies input counts for a full grid and lets you see how quickly a blanket request can grow.
Use consecutive runs when the problem depends on time. Asking someone to pick “five representative photos” usually removes the sequence before the analyst sees it. A lighting fault that lasts for the first thirty seconds after restarting equipment can vanish in a folder of hand-picked images. Have the operator export a short consecutive window that shows the first unit, transition, and stable run. Give each unit a run or event ID so related examples can stay together when assigning training and evaluation sets.
Add a contrast group when a condition tag can hide several differences. For example, a “new supplier” group might include glossier board, a revised carton seam, and a narrower label. Photograph an accepted and offset label under each observable factor wherever you can match units. Save the receipt or setup note establishing the lot or configuration. If changes cannot be separated, keep the claim narrow. Evaluation can support use on the tested combination while leaving predictions about individual materials unresolved.
Use a manifest that survives multiple hands
Give each row a stable identifier and a human-readable URI or file reference. Retain the physical unit ID, acquisition time and zone, station, view, run or lot, and setup version. Wherever a single unit has multiple views, link the views with the unit ID and distinguish the camera or orientation. File names alone are fragile. An exported crop named “good-17” could collide with a second capture, or lose the link to its original when a folder moves.
Store the original image before resizing, filtering, cropping, or compressing copies. Derive a copy for the annotation interface if it needs one. Record exactly which transform built the copy and, if possible, how a point in the crop maps to the original. An image that shows only a colored rectangle may be useful for one step and unusable for checking the carton edge later. If an annotation changes after a reviewer examines the original, preserve the reason and the version that was corrected.
Make ownership and access part of the plan. The people who know how to review defects need enough information to find the right original and applicable quality rule. They need access to it when the handoff occurs. Product photographs can include customer identifiers, proprietary artwork, or incidental details from the work area. Ask the business owner which assets can leave the station and which should stay in an internal location. Minimize unrelated content and share examples through an agreed channel. Test the folder link and role access with one representative image before collecting a whole shift.
Try an image retrieval exercise. Ask somebody who did not make the files to locate the third image of one known unit, find how its label was measured, and trace an example taken after a setup change. If they can do so only by calling the operator who captured it, revise the manifest before expanding the collection. Record the scope of a failed lookup and the repair to the collection procedure. A working dataset is a collection whose critical evidence other people can retrieve.
Audit coverage in small batches
Review a new capture batch while its conditions can still be reproduced. Open a few originals at the scale the reviewer will use and look for motion blur, edge clipping, and reflections on the target. Check that the files carry the correct station and view. Then sample accepted cases, rejected cases, and unknowns. If all the unknowns have been discarded or renamed as defects, recover the originals and keep them separate. The image usability rubric can make the audit consistent across reviewers.
Set aside examples of acceptable variations that resemble the defect. A white label section near a white carton edge may make a part of the label hard to see. An approved label change can create a vertical stripe at the place where an older design showed a seam. A carton with correct position can appear tilted if it is rotated as a whole. These examples should retain their actual artwork group and view, and the reason they are acceptable should be visible to a person. Include a paired failure with similar conditions so the intended distinction has concrete meaning.
Look at rejected frames by reason and by the unit groups that produced them. Imagine a first bench trial collects 120 physical cartons, with 15 pictures unusable. Eleven of those are from the final twenty tall cartons after setup changed. The collection tells you to investigate that change. Repeating the first hundred cartons on a stable setup would add little information about the cause of eleven unreadable frames. Return to the tall group and compare the stored view before and after the first setup adjustment. Make a resolved and unresolved count with the change history.
Use a shift representative to inspect images from outside their own run. A person familiar with the second shift may recognize the off-center position as a normal infeed behavior. They can tell you whether your grid treated it like a failure. They may also see that a particular rejected carton was intentionally put in the wrong orientation to train a reviewer. Record source and reason separately. Preserve a named example when it is an unusually informative boundary case.
Assign partitions after the unit groups are visible
Choose the group that needs to stay intact when assigning splits. Usually the same physical unit, its recaptures, and all derived crops belong together. When the question is whether the check works on a new production run, keep a run or lot together. You can plan this at collection time even if you have not selected the training approach. Reserve independent examples before using any set to choose a view, score boundary, or defect definition. Material exposed during those decisions is useful development evidence.
A set that covers normal day-to-day variation can remain frozen even as you keep collecting training examples. Keep the names and checksums or asset IDs that identify its contents. Record who can read and change that split. If a reference outcome is wrong, log the correction and recalculate comparisons on the corrected basis for both versions. If an evaluation case is impossible to use, preserve the reason and record any replacement. The split guide works through independence at unit, burst, and lot levels.
Build a second deliberate challenge set for protected cases that are rare in the everyday collection. Keep its report separate. A challenge set with half defective units can stress the boundary and show which cases cause mistakes. The ratio of alerts to defects from that set can differ substantially from an ordinary shift where faults are much rarer. Use the challenge results to make specific decisions about scope. Collect a consecutive production sample for a realistic estimate of how much review work the check will create.
Make sure both sets contain cases a human can settle. If you retain an unreadable intended label case, give it the required disposition “recapture” or “manual review” when that is the test objective. The outcome tells you how the workflow handles missing evidence. It cannot be converted into a reference defect measurement without the missing evidence. Log the relationship between raw images, decided labels, and workflow outcomes so the evaluation can report the three populations correctly.
Walk one fictional collection from request to review
Imagine a small packaging team has two carton heights. Its current instruction defines a bottom placement boundary. The machine presents an upright front view before closure. Reviewers need both the carton datum and the label’s lower edge. A new gloss label stock is scheduled for the next week. The quality owner wants to find whether the lower edge remains visible and whether a distinctly low label can be caught before a carton leaves the bench.
The planned collection starts with usual production. Ask for four short windows spread over the two carton heights and the available shifts. Maintain the true unit sequence in each window. Keep photos from the same run together so you can audit time-based changes. Leave the camera setup unchanged for the first pass. The first twenty units from both heights get a settled human placement decision while still at the station. Review other batches as part of the ordinary process if those reference decisions can be retrieved later.
For the protected collection, ask the quality owner to approve independent cartons with label edges at and past the boundary. Have someone measure them using the same rule each time. Collect accepted look-alikes, among them a correctly placed label on a slightly tilted carton and a low-looking print block inside a correctly placed label. Keep a few fully independent units at the same conditions for the final test. Label each view with the relevant datum and note unresolved cases without assigning a guessed defect class.
When glossy stock arrives, start by capturing the previous stock and the new stock in the same session. Hold the mount and lamp settings. Review whether the edge is visible on each accepted and failing unit. If the highlight blocks the lower edge, save the originals and define when to ask for a new view. Try a light adjustment across both materials. Keep the original collection so the comparison can explain whether old conditions lost usable contrast. If the team elects to change the light, the new setting needs fresh production examples before the old evidence is carried forward.
Compare what the team knows when the batch ends. Most matte areas may be supported, with too few independent tall gloss rejects. The collection request can then name the missing group directly: tall glossy cartons with a measurable label below the limit, captured with the approved light on a separate run. It can also name an interim disposition for glossy units that arrives before the retest. Ask for targeted independent units instead of a blanket addition to the image count.
Agree on what ends a collection round
Close a round with a coverage summary and a short decision. Record which unit, lot, view, and defect groups are usable for development, which are reserved, and which remain scarce. For each unresolved group, write what evidence would change the decision and who can obtain it. A run can end with a narrow check ready for evaluation and a specific capture problem still open. A single “dataset finished” flag conceals that distinction.
Check whether a reviewer can reproduce the way you assigned reference outcomes. Select a handful of independent examples from different conditions, show them using the same tools the reviewers will have, and capture disagreement reasons. If the team disagrees about the rubric, fix the rule and retain the earlier referring examples. If they agree on the rule but cannot see the necessary evidence, prioritize capture. Each intervention answers a different question.
A late collection request can remain small if the records are intact. Ask for the next available setup window, reserve the physical units before disposal or rework, and confirm the view and event IDs. Give the team exact evidence gaps they can close. For a first pilot, the best next request is often a single contrast pair photographed under the same setup, plus a fresh group of independent units to check that the distinction holds. Bring the coverage and outstanding conditions to the pilot evaluation guide before defining any release scope.
Budget review and storage before asking for more images
Estimate the annotation effort by counting decisions and time per decision. For illustration, assume a person can settle ninety straightforward label placement examples at forty seconds each. That is sixty person-minutes. Suppose thirty difficult borderline cases take three minutes each because a reviewer must locate the original and verify a measurement. Those thirty require another ninety person-minutes. An image request based on a flat forty seconds for every case would reserve eighty minutes for a task that actually needs a hundred and fifty. If you can, measure a small representative batch at the station and during labeling before setting the collection schedule.
Use that estimate to move costly work to the right moment. Retrieving a carton for a physical recheck can take longer after it leaves the station. Photographing the datum separately and recording a measurement while the product is accessible may cost little. Give disputed examples a holding location and decision deadline that fits the line’s procedure. Ask the lead whether separating a few independent boundary cases for manual measurement will increase the value of the collection without disrupting normal flow.
Track the storage footprint of the original evidence and its derivatives. If each of two cameras exports a 1.8 MB file for each of 600 units, the originals occupy approximately 2.16 GB before copies and backup. A separate review export of 300 kB per image adds 360 MB. Your capture settings and format determine the real size. Verify the estimate on a representative sample under the intended image settings. Compression and feature visibility deserve a paired test. A reduced export that looks adequate on a monitor can hide a thin edge when compared at the scale used for review. Retain the original required to settle that dispute.
The retention decision depends on what you need to reproduce. Development snapshots may need different access from a frozen evaluation record. Work with the data owner to define which raw originals, reviewed decisions, and scopes need to stay available. Document what happens to unused images, especially frames that captured unrelated details. A documented identifier and review outcome can sometimes be retained with a more tightly scoped reference image where the quality procedure permits it. Keep enough information to understand the decision and its limitations.
Prepare for a batch the team cannot use
An unusable batch needs a diagnosis before it needs a repeat. Say the technician exported 600 files but the device clock reset during a power cycle. Several groups could share the same names and times. Start by listing what you can still verify from the station and production logs, and hold the questionable groups out of independent evaluation. Preserve the original files before renaming them. Rebuild identity from recorded run boundaries and distinctive unit IDs where you have both. If you can reconstruct one batch and not another, report the recovery separately so that people do not attribute the uncertainty to every image.
When a lighting or angle issue affects most of a single run, isolate the cause with a short comparison. Capture a current image of a reference unit and compare it with a stored known view, using the same output scale. Then test an approved adjustment on one clearly accepted example, one known defect, and one ambiguous case. This narrow scratch test can establish that a feature is visible again. It cannot support a broad estimate of how often the issue occurs, so resume the intended collection once the visibility problem is resolved. Keep the abandoned capture as evidence about the setup failure.
Close salvage work with written criteria for what can rejoin the collection. The record should say which unit groups remain independent, where the original images live, and whether the quality team can reproduce the reference outcome. Give the remaining evidence gaps a short, actionable request. A revised request for one held-out glossy lot and two recoverable datum views is useful to the operator who will do the work.